Understanding Interior Photography
What is Interior Photography?
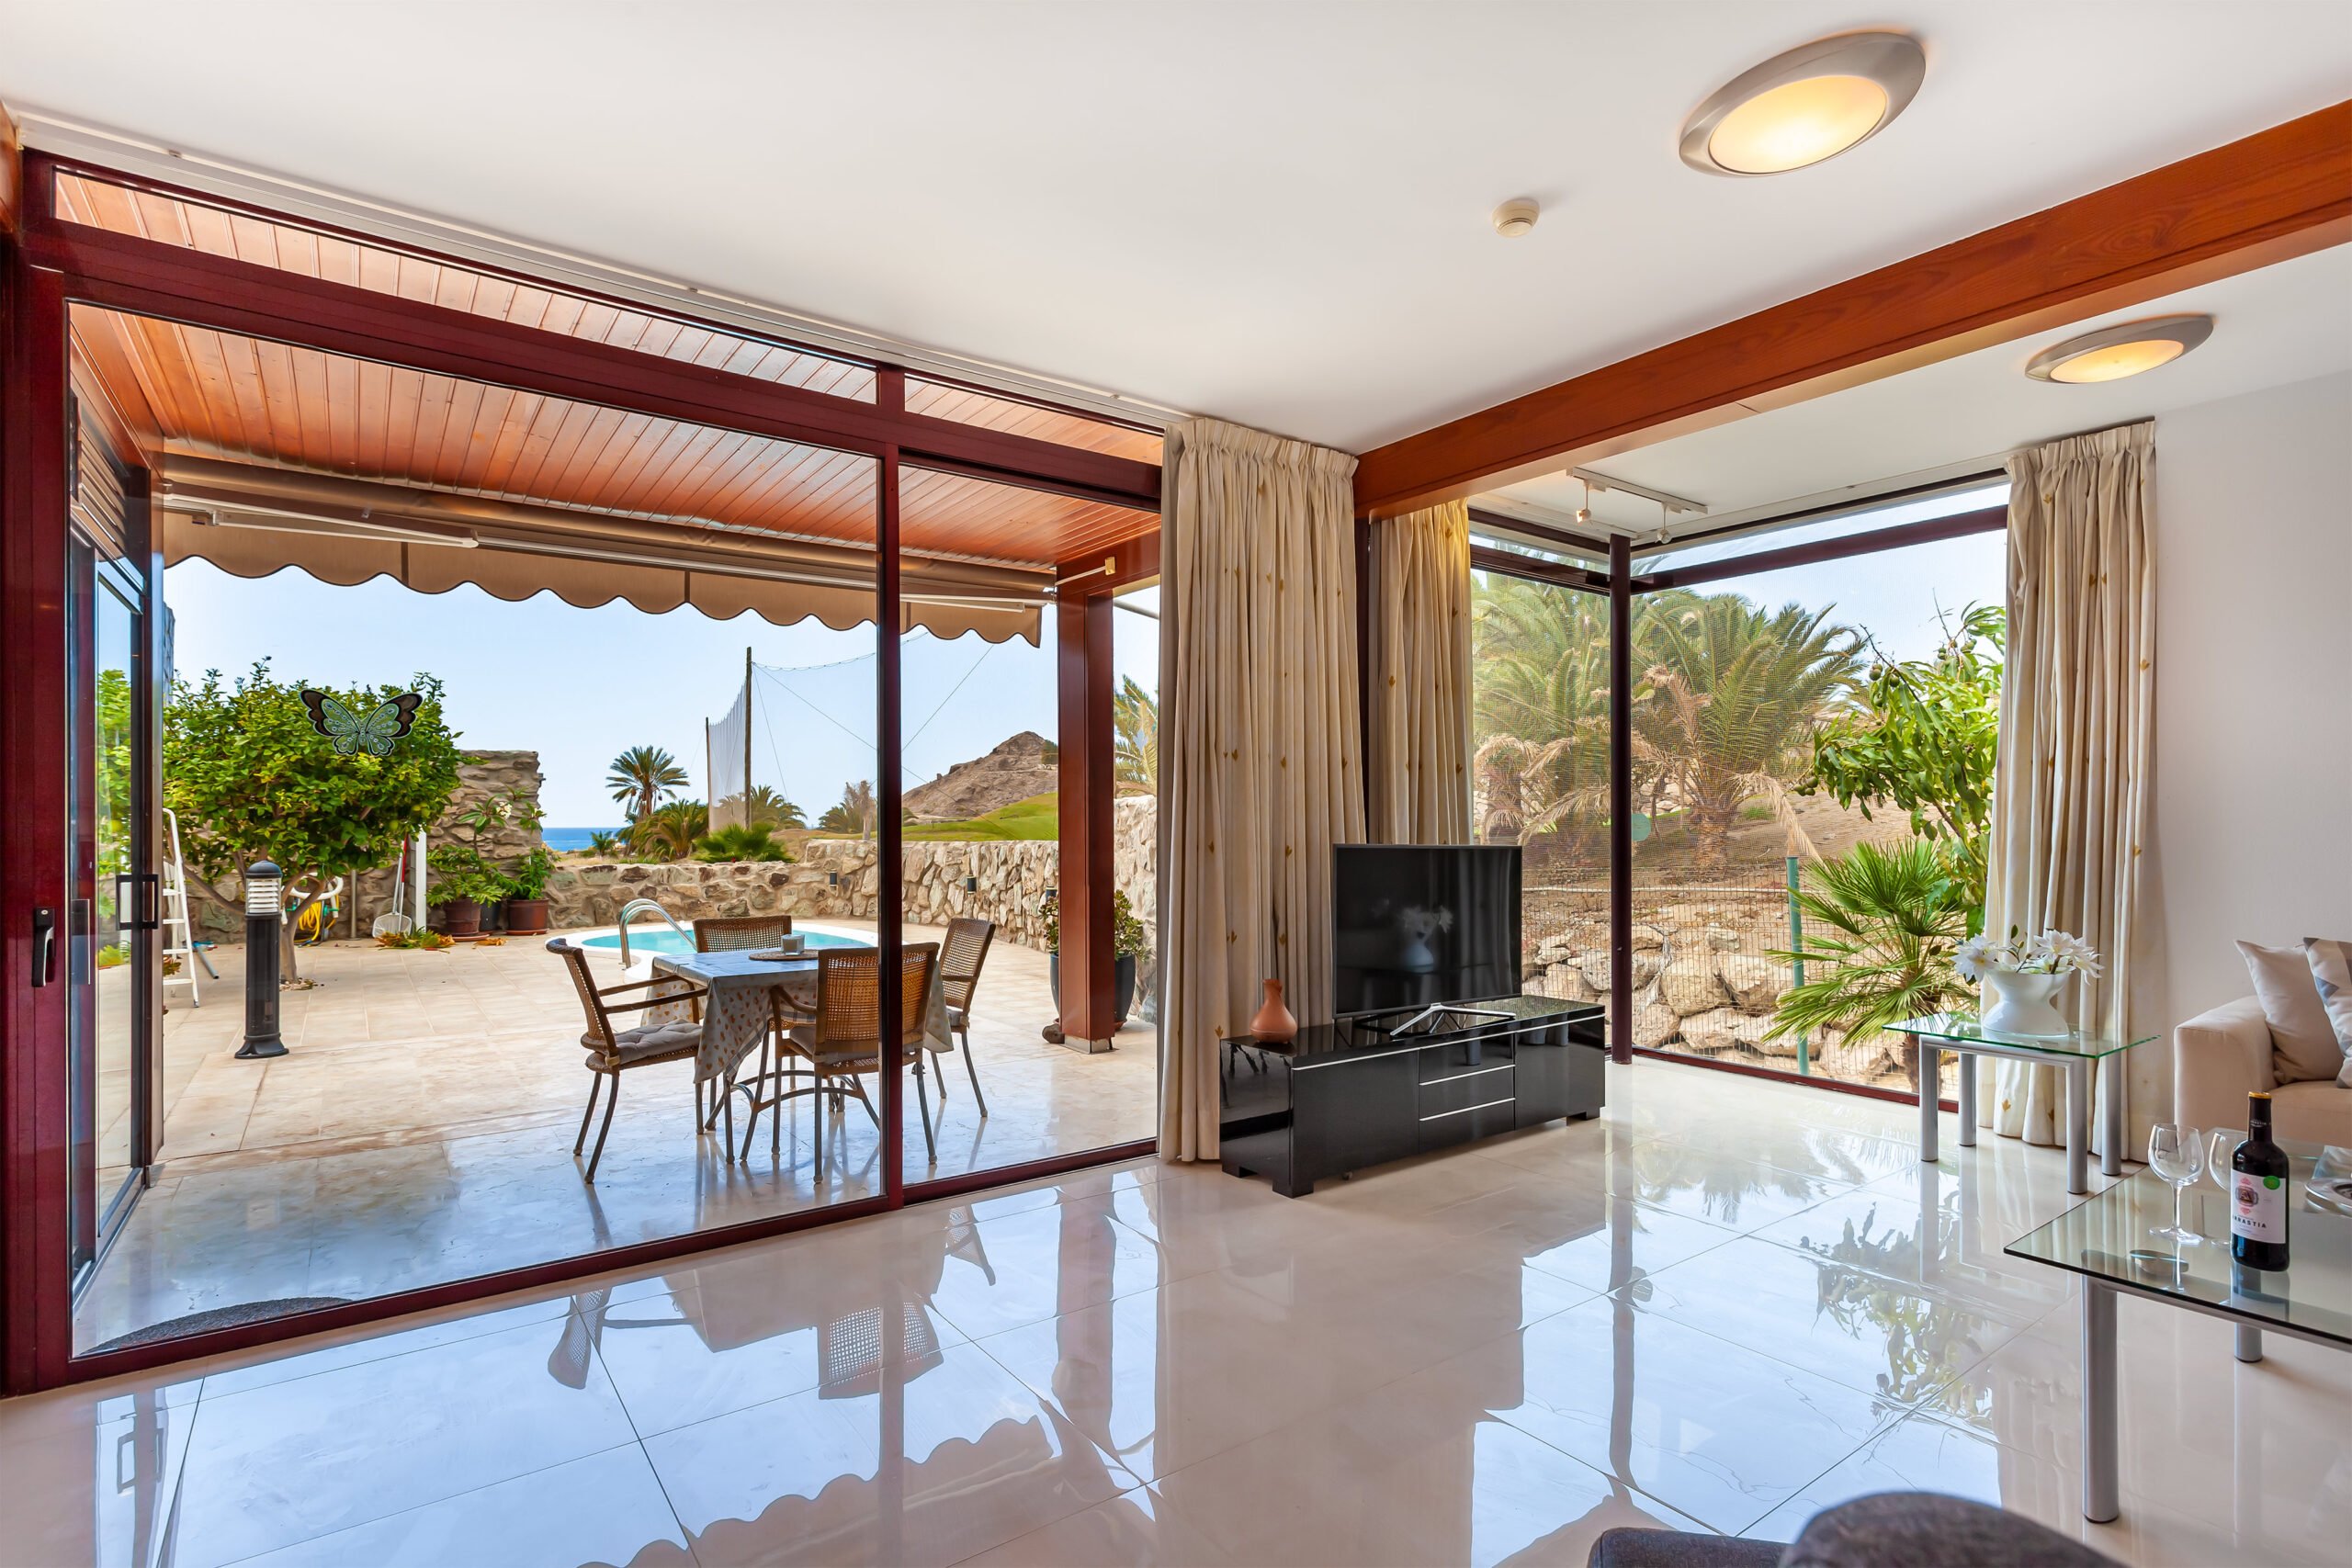
Interior photography focuses on capturing the designs and architecture of indoor spaces, showcasing details in aesthetics, functionality, and ambiance. It aims to highlight the features and character of a space, making it appealing to potential buyers, renters, or clients. This form of photography is essential in real estate, because it provides an immersive look at properties and helps convey the lifestyle associated with living there.
Importance of Interior Photography in Real Estate
Effective interior photography is crucial for marketing properties in the real estate sector. High-quality images can differentiate listings and attract more interest from prospective buyers. Professional photography can enhance the perceived value of a property, resulting in quicker sales and potentially higher offers. Stakeholders, including architects and real estate agents, rely on compelling images to showcase their work and close deals.
Preparing for the Shoot
Equipment Essentials
Choosing the Right Lens
The choice of lens significantly impacts the quality of interior photos. A wide-angle zoom lens, such as a 14-24mm or 16-35mm, is often recommended to capture more of the space, creating a perception of openness and depth. However, when photographing more nuanced architectural details, lenses around 35mm to 50mm can provide less distortion and deliver a more accurate representation of the room.
Camera Settings for Interior Photography
Setting your camera properly before shooting can yield excellent results. Use a low ISO of 100 or 200 to minimise the noise, and opt for a smaller aperture, such as f/8 to f/16, for greater depth of field. This ensures that both foreground and background are well-focused, resulting in a clear and professional-looking photograph. Utilising a tripod is essential to stabilise the camera and allow for longer exposures without blur.
Planning the Shoot
Scheduling the Best Time of Day
Timing is crucial in interior photography. It is typically best to schedule your shoot during the golden hours, shortly after sunrise or before sunset, when natural light is soft and warm. This light can enhance the space’s warmth and appeal. Be mindful of how outside light interacts with the interior and adjust your timing if you want to capture specific outdoor features.
Collaborating with Architects and Designers
Communicating with interior designers before the shoot is vital to understanding what makes the space special. Discuss particular features they want to highlight, such as unique windows or specialised materials. Collaboration ensures that your photography aligns with their vision and that you capture all essential angles, resulting in compelling imagery.
Composition Techniques
Perspective in Interior Photography
One-point vs. Two-point Perspective
Understanding perspective is key to effective interior photography. One-point perspective focuses on a single vanishing point in the composition, often effective for center-focused rooms. Two-point perspective, on the other hand, uses two vanishing points and can create a more dynamic portrayal of the space, especially in larger rooms. Utilize these techniques to bring dimensionality to your photographs.

Finding the Right Angles
Shooting Height and Framing
The height from which you shoot can heavily influence the perception of space in your photographs. Ideally, your camera should be positioned at eye level or just above, particularly for interiors with high ceilings. This approach allows for a more natural and inviting view. Additionally, framing your shots carefully to include visual leading lines can guide the viewer’s eye through the image and create a sense of flow.
Lighting Considerations
Natural Light vs. Artificial Light
Interior photography often relies heavily on lighting to create the mood and ambiance of the space. Using natural light can infuse warmth and realism, but it is essential to control how much light enters the shot. In contrast, artificial lighting provides the flexibility to illuminate specific areas, especially in darker spaces. Use a combination of both to achieve the best results.
Using Flash and Strobes Correctly
When relying on artificial lighting, mastering flash and strobes becomes crucial. They help fill shadows and balance out light levels, but it’s vital to diffuse this light to avoid harsh highlights. Softboxes or umbrella modifiers can soften the light and produce a more natural look. Adjusting the distance and positioning of the lights will help achieve an even illumination that enhances the overall composition.
Managing Reflections and Shadows
Reflections and shadows can significantly alter the quality of interior photos. To handle reflections, make use of polarizing filters that can help reduce glare on windows and shiny surfaces. Managing shadows, particularly from light fixtures or furniture, is essential; ensure they don’t distract from the main subject. Balancing the light levels between exterior and interior elements ensures a cohesive look.
Capturing Detailing and Variety
Importance of Detail Shots
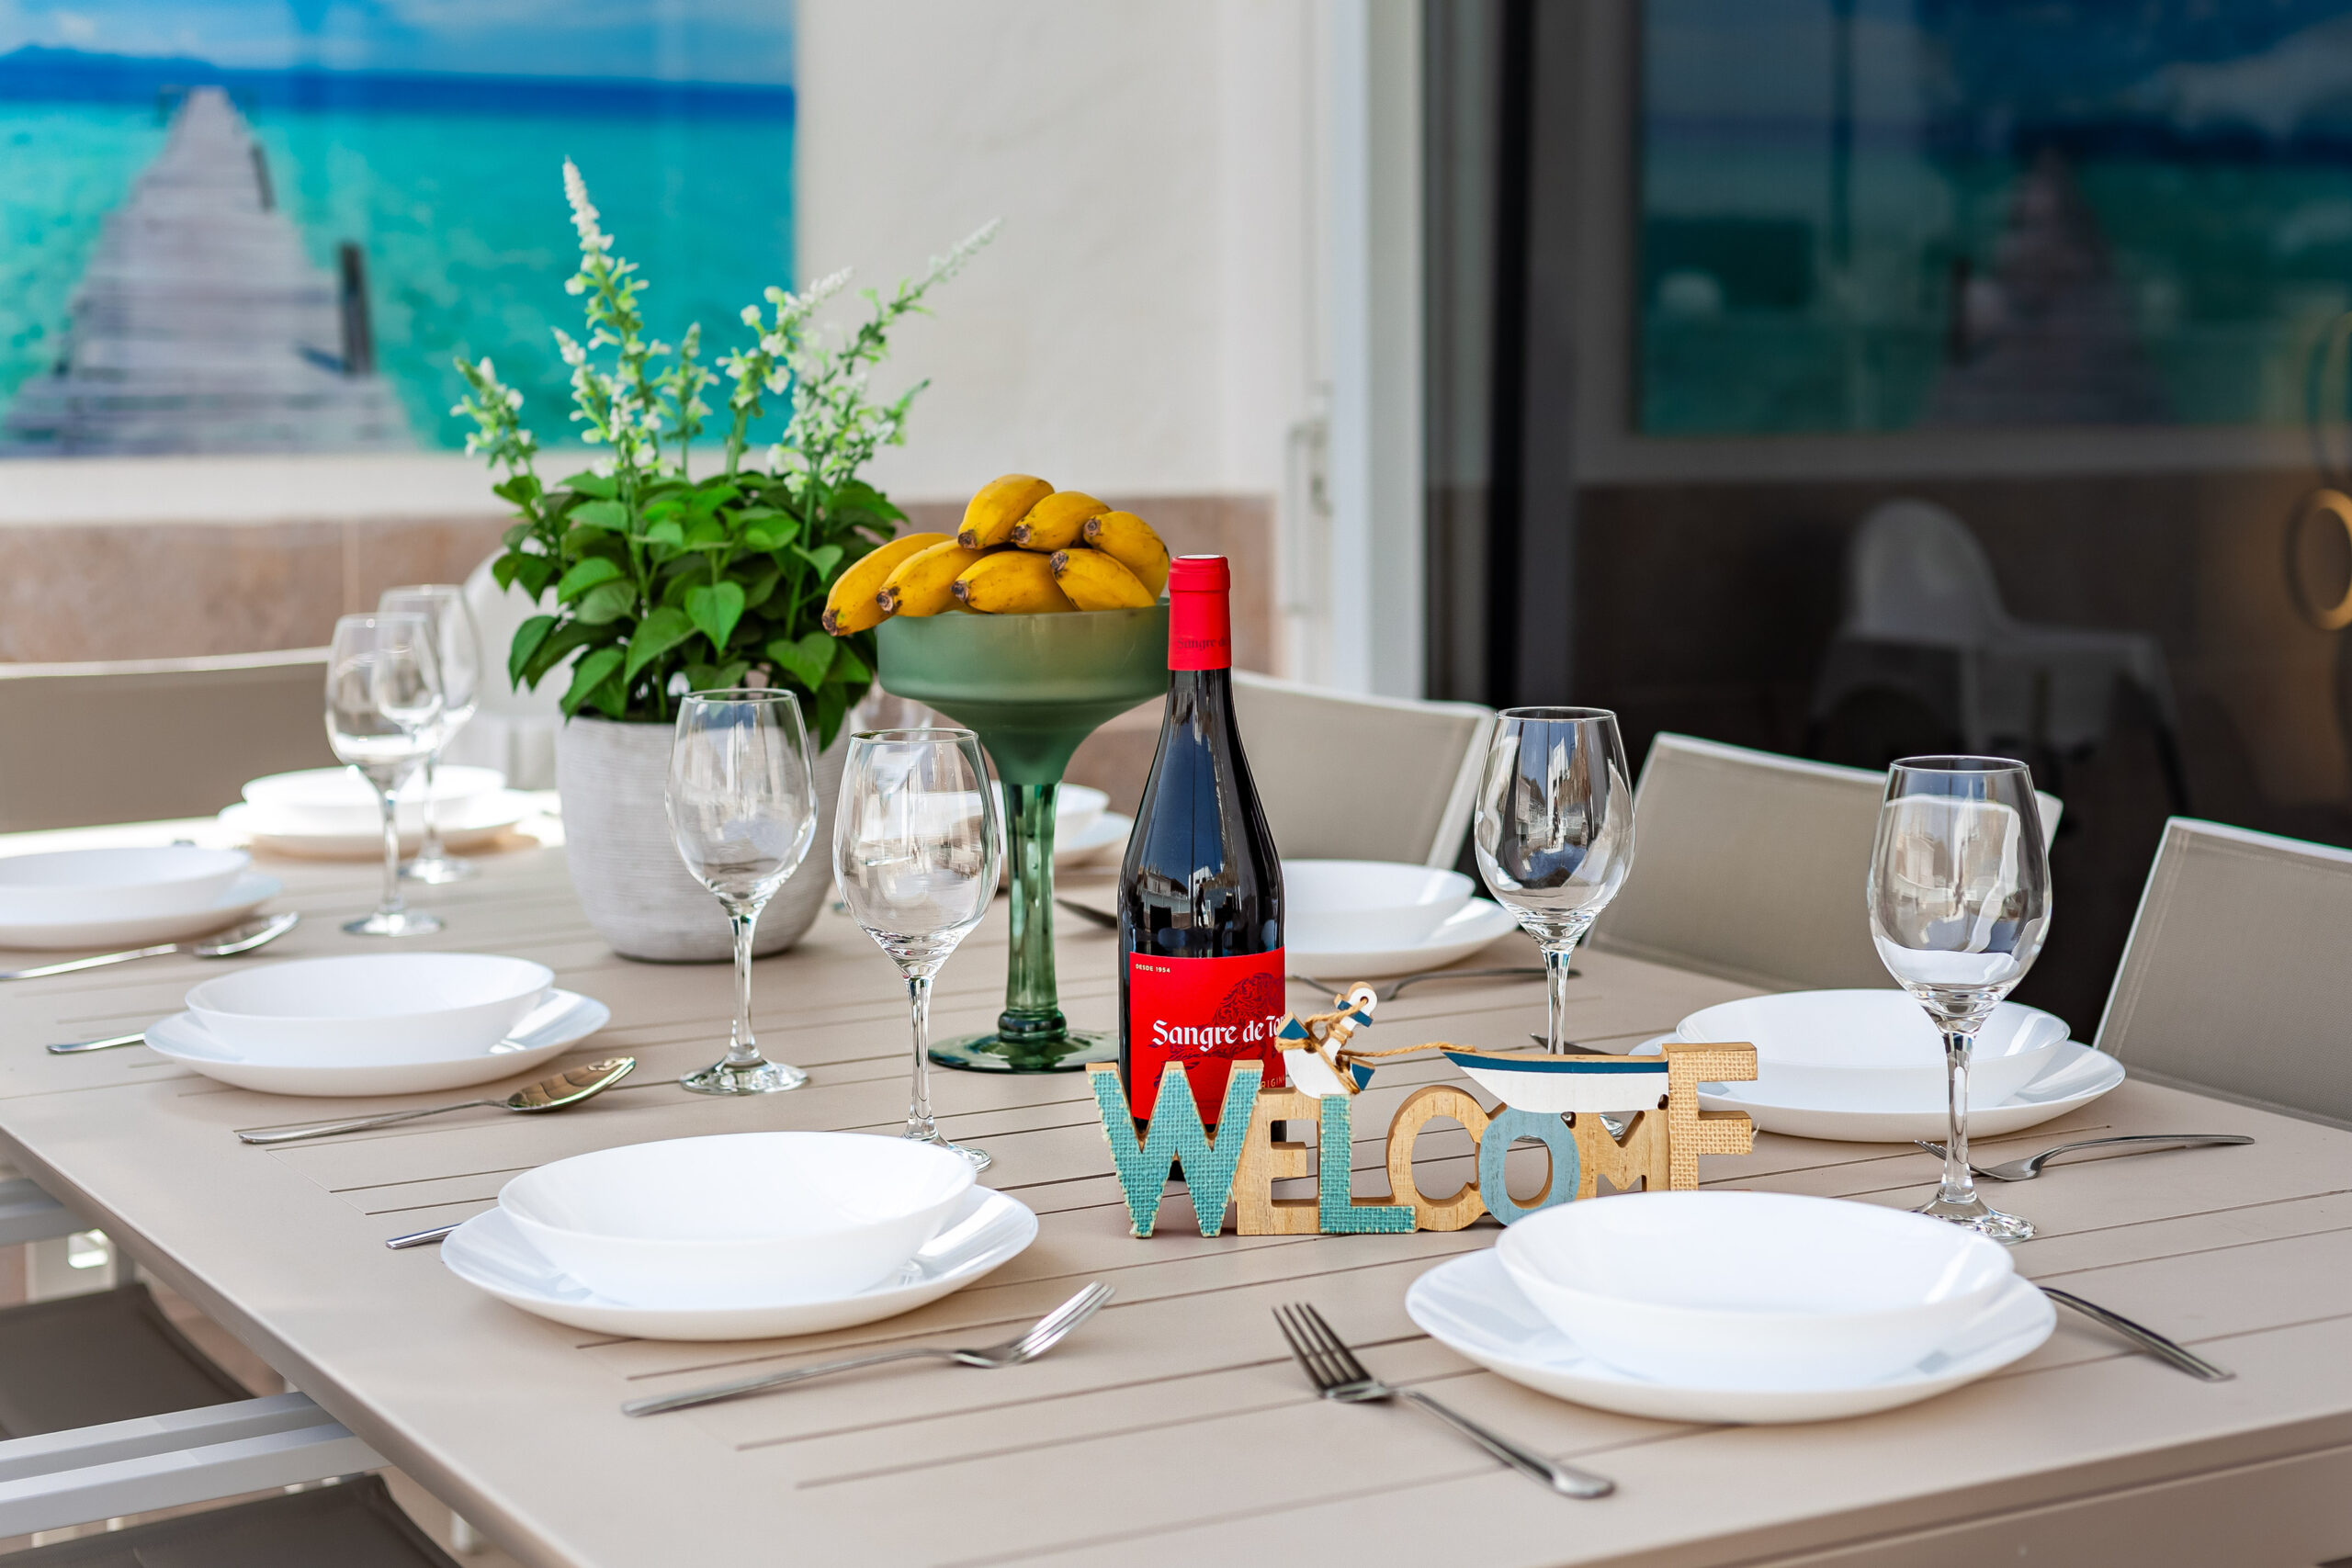
Detail shots play a significant role in telling the story of a space. Capturing elements like intricate moldings, unique decor, or functional features can provide context and add depth to the overall presentation of the property. These shots help potential buyers visualize themselves in the home by highlighting personal touches and craftsmanship.
Why Wide-angle Shots are Crucial
Wide-angle shots are indispensable in real estate photography as they convey the spaciousness and layout of rooms effectively. They offer a more immersive experience for the viewer, creating the illusion of a larger space, which is particularly beneficial in smaller homes. However, it’s vital to ensure that wide-angle lenses are used to avoid excessive distortion that can misrepresent the room.
Mixing Styles: Wide and Close-Up Shots
Combining wide shots with close-up detail photography adds variety and dynamism to your portfolio. Close-up shots of textures or materials make the images feel more intimate and engaging. Mixing these styles creates a narrative that gives a comprehensive view of the property, allowing potential buyers to appreciate both the overall layout and the finer details that make the space unique.
 Post-Processing Tips
 Post-Processing Tips
Essential Editing Software
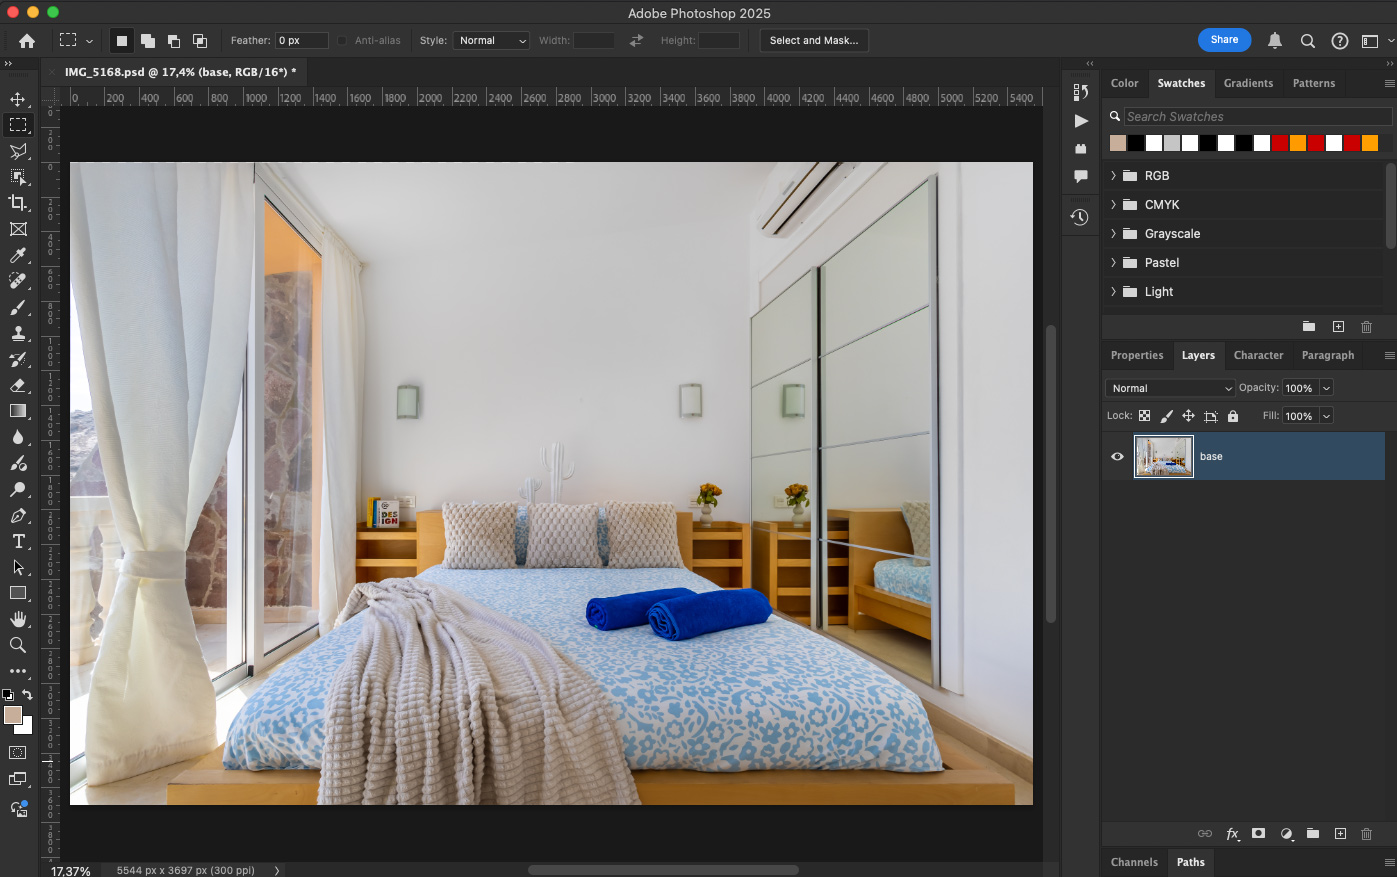
Edit your interior photography with professional editing software to enhance image quality. Programs like Adobe Lightroom and Photoshop are widely used for their extensive features that allow for advanced adjustments. Utilizing these tools, you can refine elements like color balance, exposure, and sharpness, elevating your images to professional standards.
Techniques for Color Correction and Dynamic Range
Color correction is essential in ensuring that the hues in your photographs are true to life. Use the histogram in your editing software to adjust exposure levels and manage highlights and shadows effectively, creating a balanced image with proper dynamic range. Employing the technique of bracketing—taking multiple exposures of the same shot—allows you to blend several images together for optimal lighting.
Common Mistakes to Avoid
Overly Distorted Angles
One of the most common pitfalls in interior photography is capturing images with distorted angles due to improper lens choice or camera positioning. Avoid wide-angle lenses that create excessive distortion by being mindful of the focal length you choose. Aim for straight, vertical lines and balanced compositions that present the space accurately.
Incorrect Camera Tilts
Tilting the camera can lead to skewed perspectives that undermine the professional quality of your photographs. To maintain vertical lines, always shoot with the camera level and use a tripod where necessary. Adjusting the composition in-camera rather than relying solely on digital corrections can yield better outcomes in your final images.
Neglecting to Clean Up the Space
Before shooting, it’s essential to declutter the space to focus on its best features. Removing distractions, aligning furniture, and ensuring that each room is tidied up helps create polished, appealing images. Pay attention to small details such as removing personal items, adjusting cushions, or clearing visible objects that may detract from the room’s aesthetic appeal.
Finding Your Unique Style
Practical Tips for Continuous Improvement
As an interior photographer, continuously improving your craft is vital. Experiment with different styles of photography, angles, and lighting setups to find what works best for you. Seek feedback from clients and peers to gain insights and perspectives on your shots, and don’t hesitate to take workshops or online courses to enhance your skills.
Building a Portfolio that Stands Out
Creating a diverse portfolio showcasing various types of interior and architectural photography is crucial for attracting clients. Highlight your best work and include a variety of styles, compositions, and lighting to demonstrate your versatility. An outstanding portfolio not only attracts clients but also helps establish your unique artistic voice.
FAQ
What is the best lens for interior photography?
The ideal lens for interior photography is a wide-angle lens, ideally between 14mm and 35mm, to capture spaciousness without significant distortion.
How can I improve my interior photography lighting?
Improving interior photography lighting involves utilizing a mix of natural light and artificial light sources, using soft diffusers to control shadows and highlights effectively.
What camera settings should I use for shooting interiors?
Use a low ISO setting (100-200), a small aperture (f/8-f/16), and shoot at a tripod-mounted eye level for optimal depth and clarity.
How important are detail shots in interior photography?
Detail shots are crucial as they highlight unique features and textures of a space, helping to create a connection with potential buyers or clients.